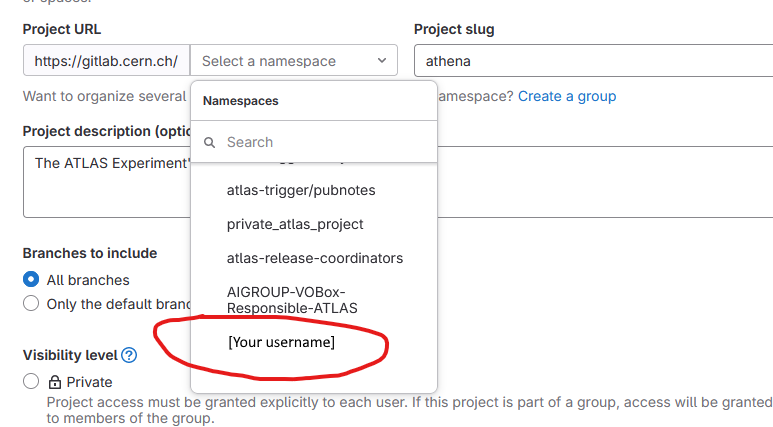
The main ATLAS offline git repository we will use in the tutorial
is https://gitlab.cern.ch/atlas/athena. Follow that link
and then create your own copy of the
repository by pressing the Fork button on the project’s
front page.
If you are presented with a number of group options when you start to fork, pick your personal account for this tutorial. There are some good uses for group forks in sub-domains to work on large developments, but we won’t cover that workflow in this tutorial.

It is recommended you select “Only the default branch main” to save some space.
That’s all there is to creating a fork!
You now have your own personal copy of the ATLAS offline code that you can modify as you like. You will also be unperturbed by other developers working on their forked copies.
Add your friendly build bot
Your development will be built and tested by an automated continuous integration
system as you will see later. Results of these
automatic builds are published on GitLab as small icons next to commit
hashes. In order for this to work, the build bot needs to have access to your
private fork. Therefore, please go to Project Information -> Members at the
top of the left toolbar:
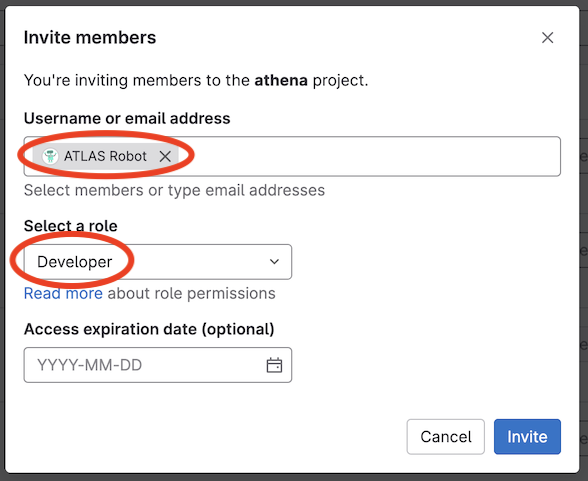
then click on Invite members:
and finally add ATLAS Robot (@atlasbot) as Developer to your project.


